
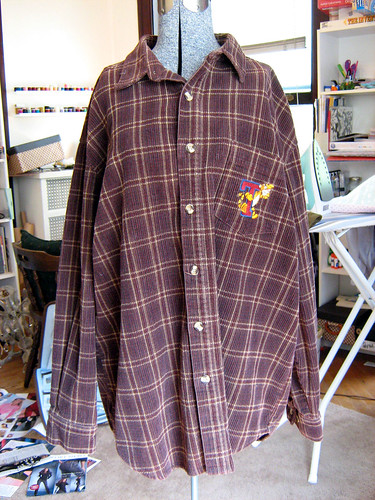
Two tutorials in one week? Has the world gone mad?! Apparently so, but your response to my bracelet tutorial was so sweet that I decided to post another that I’ve been working on. This project is part of a larger push to craft my fall wardrobe. For various reasons, I’ve decided to skip the mall and make the key pieces that I want for autumn, using materials that I have on hand whenever possible. My brother gave me this old work shirt when I was visiting him in Wyoming last week, and in it I immediately saw something that I’ve been wanting to make for a long time – a sweet little shoulder cape. Of course, I still had to figure out how to do it. Taking pictures along the way, I managed to work out a pretty easy method (not that there wasn’t some cursing and seam ripping from time to time). Hopefully I’ll be able to explain it without too much confusion…here we go!
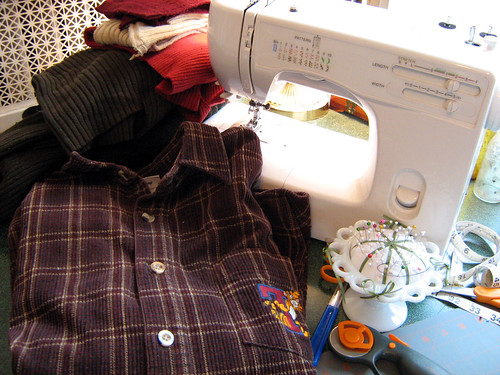
Start by gathering up your materials. You’ll need an oversized men’s work shirt (at least one size larger than you are), a sweater of the same size or larger, and basic sewing/cutting supplies (sewing machine, thread, needles, pins, measuring tape, scissors or a rotary cutter, etc.).
After removing the pockets and any other external details that you don't want, measure across the top of your shoulders from shoulder bone to shoulder bone. Add 2” to this measurement. Mark that length across the shoulders of your shirt, centering the tape on the center of the collar. Mark each end with pins.
Now measure the sleeves of your work shirt from the top of the cuff to the armpit. This will be the maximum length of your capelet (you’ll see why in a minute). Mark that measurement on each side of the shirt, measuring from the top of the shoulder (this doesn't have to be done with the shirt inside-out, I just thought the pictures were easier to understand without the busy plaid showing).

Cut a straight line from your marks at the top of the shirt to the marks on the sides, cutting off the shirt sleeves (set these aside, you’ll need them soon). Then cut a horizontal line from one side mark to the other, cutting off the bottom of the shirt. You’ll be left with something that looks a bit like a vest, but with open sides.


Now it’s time to deal with the sleeves. Cut off the cuffs and side seams of the sleeves, so that they will lay open flat. The top of your sleeves will have a rounded edge – cut those off to make a straight edges all around.

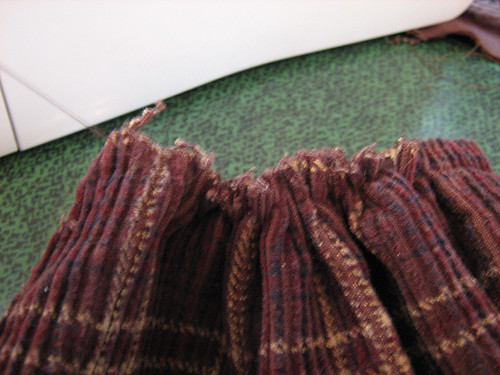
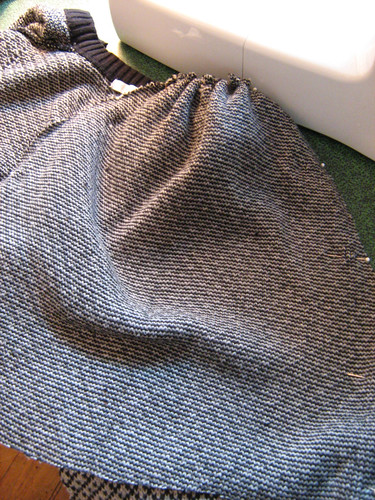
Set your machine stitch length as long as it will go, and topstitch straight across the wide end of your sleeves (what used to be the shoulder side). Gently pulling on the needle thread, gather this end.
With right sides together, pin what used to be your sleeves into the open sides of your shirt. Match the center of the sleeves’ gathered edges to the shoulder seams of the shirt, then pin all the way around the sleeve. Baste into place.

Flip your shirt right side out and try it on. It should be looking quite cape-like now! If you like the fit, press, stitch over your basting, and press again. If not, make necessary adjustments.

Set your cape aside for the moment; we are going to deal with the lining now. Basically, all you need to do is repeat the same steps you just took above, but using your sweater.
Start by cutting the sweater up the center (assuming that your sweater isn’t a cardigan), to make its shape match the original shape of the shirt. Topstich along the cut edge to keep it from fraying.

Measure and mark the shoulders, using a length that is 1” less than the measurement you originally used. Measure and mark the sides, again using a measurement that is 1” smaller than your original. Cut from the shoulders to the sides, cutting off the sleeves. Cut off the bottom.
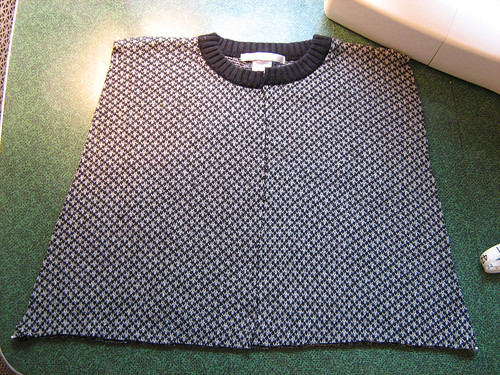
Cut open your sleeves, removing the cuffs and the rounded top edge. Gather the top edge. Pin the sleeves into the open sides of the sweater, right sides together, and stitch. Your sweater should now look rather cape-like as well!
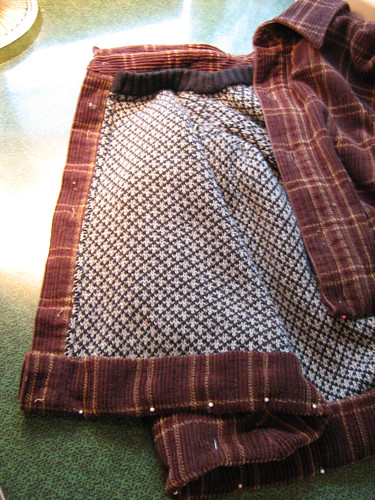
Now it’s time to attach the lining to the cape. With wrong sides together, lay the sweater out inside the cape. Fold the raw center edges to the inside, aligning the folds with the button placket on either side. Pin sweater to cape along the sides and top, then stitch with thread that matches the exterior fabric. You can leave the bottom of the sweater unsewn.

Almost done – it’s hemming time! Fold the raw bottom edge of the shirt up 1” to meet the raw bottom edge of the sweater. Then fold the shirt up one more time to enclose both edges in the hem. I had to do a bit of clipping and fiddling to get my hem to lay straight, and A LOT of pressing with high heat and steam to get it to look nice. Pin your hem in place and stitch.

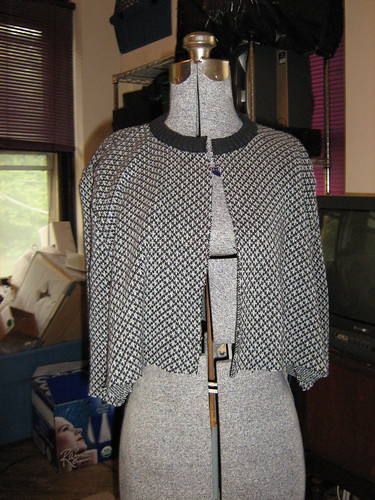
Voila! Your lovely retro-inspired cape is done. All that’s left is my favorite part – dealing with the purely aesthetic details. I started by removing all of the original buttons; then I cut down the collar and added a hook closure and two vintage mother-of-pearl buttons. I finished the whole thing off with a couple of doilies, and that was that!

This cape is toasty warm, and will serve you well into the season. Wear it to jump in crunchy leaves, to go walking on a crisp evening with the smell of woodsmoke in the air, to pick apples and take the first delicious bite, or to ride in a hay wagon and sing silly songs with your friends. All the lovelies of fall are just around the corner
Start by gathering up your materials. You’ll need an oversized men’s work shirt (at least one size larger than you are), a sweater of the same size or larger, and basic sewing/cutting supplies (sewing machine, thread, needles, pins, measuring tape, scissors or a rotary cutter, etc.).
After removing the pockets and any other external details that you don't want, measure across the top of your shoulders from shoulder bone to shoulder bone. Add 2” to this measurement. Mark that length across the shoulders of your shirt, centering the tape on the center of the collar. Mark each end with pins.
Now measure the sleeves of your work shirt from the top of the cuff to the armpit. This will be the maximum length of your capelet (you’ll see why in a minute). Mark that measurement on each side of the shirt, measuring from the top of the shoulder (this doesn't have to be done with the shirt inside-out, I just thought the pictures were easier to understand without the busy plaid showing).
Cut a straight line from your marks at the top of the shirt to the marks on the sides, cutting off the shirt sleeves (set these aside, you’ll need them soon). Then cut a horizontal line from one side mark to the other, cutting off the bottom of the shirt. You’ll be left with something that looks a bit like a vest, but with open sides.
Now it’s time to deal with the sleeves. Cut off the cuffs and side seams of the sleeves, so that they will lay open flat. The top of your sleeves will have a rounded edge – cut those off to make a straight edges all around.
Set your machine stitch length as long as it will go, and topstitch straight across the wide end of your sleeves (what used to be the shoulder side). Gently pulling on the needle thread, gather this end.
With right sides together, pin what used to be your sleeves into the open sides of your shirt. Match the center of the sleeves’ gathered edges to the shoulder seams of the shirt, then pin all the way around the sleeve. Baste into place.
Flip your shirt right side out and try it on. It should be looking quite cape-like now! If you like the fit, press, stitch over your basting, and press again. If not, make necessary adjustments.
Set your cape aside for the moment; we are going to deal with the lining now. Basically, all you need to do is repeat the same steps you just took above, but using your sweater.
Start by cutting the sweater up the center (assuming that your sweater isn’t a cardigan), to make its shape match the original shape of the shirt. Topstich along the cut edge to keep it from fraying.
Measure and mark the shoulders, using a length that is 1” less than the measurement you originally used. Measure and mark the sides, again using a measurement that is 1” smaller than your original. Cut from the shoulders to the sides, cutting off the sleeves. Cut off the bottom.
Cut open your sleeves, removing the cuffs and the rounded top edge. Gather the top edge. Pin the sleeves into the open sides of the sweater, right sides together, and stitch. Your sweater should now look rather cape-like as well!
Now it’s time to attach the lining to the cape. With wrong sides together, lay the sweater out inside the cape. Fold the raw center edges to the inside, aligning the folds with the button placket on either side. Pin sweater to cape along the sides and top, then stitch with thread that matches the exterior fabric. You can leave the bottom of the sweater unsewn.
Almost done – it’s hemming time! Fold the raw bottom edge of the shirt up 1” to meet the raw bottom edge of the sweater. Then fold the shirt up one more time to enclose both edges in the hem. I had to do a bit of clipping and fiddling to get my hem to lay straight, and A LOT of pressing with high heat and steam to get it to look nice. Pin your hem in place and stitch.
Voila! Your lovely retro-inspired cape is done. All that’s left is my favorite part – dealing with the purely aesthetic details. I started by removing all of the original buttons; then I cut down the collar and added a hook closure and two vintage mother-of-pearl buttons. I finished the whole thing off with a couple of doilies, and that was that!
This cape is toasty warm, and will serve you well into the season. Wear it to jump in crunchy leaves, to go walking on a crisp evening with the smell of woodsmoke in the air, to pick apples and take the first delicious bite, or to ride in a hay wagon and sing silly songs with your friends. All the lovelies of fall are just around the corner
fuente
blog.craftzine.com/
How cute! ^ ^
ResponderEliminarI'll try to make one :D