Aprenda a hacer facilmente un hermoso corsage Navideño (o cualquier otra ocasion) para lucirlo en su proxima fiesta. Visiten nuestra pagina web: www.movidosytocados.com Feliz Navidad con decoupage. Todo lo que tienes que saber para hacer decoupage con papel de regaloPrimer parte del tuto de una sencilla y rapida bandeja navideña. Aqui presentamos una manera facil de hacer un adorno navideño para la puerta. Lucy Rubio nos enseña cómo crear lindas decoraciones navideñas sobre géneros utilizando pintura glitter. .
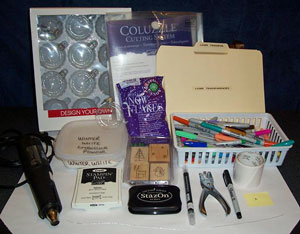
Supplies

- Outline stamps of your choice
- 2 ½" clear Glass Ball Ornament
- Sheet of Laser Transparency Film (heat resistant; available at office supply stores)
- Coluzzle® circle cutting kit
- White Embossing Powder
- Heat Tool
- 1/8" Hole Punch
- Small Sticky Notes
- Black Stazon™ Ink
- White Pigment Ink
- Blender Pen
- Silver Cording
- Mini Glue Dots
- Buffalo Snow, also called Iridescent Ice Flakes (available at craft stores)
Step-by-Step
-
Step 1
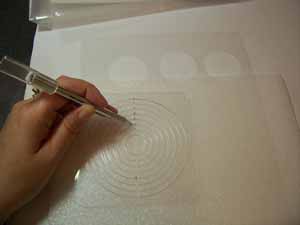
Using a Coluzzle cutting system, cut a circle from laser transparency film roughly ½" smaller than the diameter of the glass ball ornament.
For this 2 ½" size ornament, this will be the 3rd ring from the center
-
Step 2
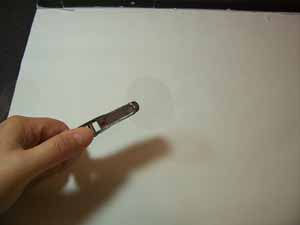
Punch a hole in the top of the transparency circle with a 1/8" punch.
-
Step 3
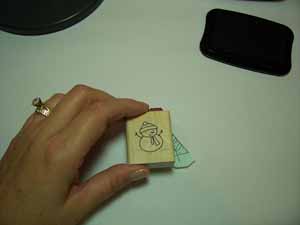
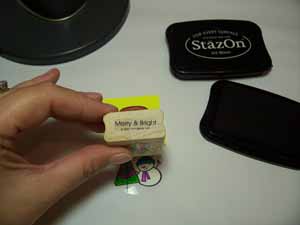
Stamp image with Black Stazon. Affix a sticky note “handle” to the top to help reduce fingerprints and prevent messy product combinations.
This is Side A; write an "A" on the sticky note.
-
Step 4
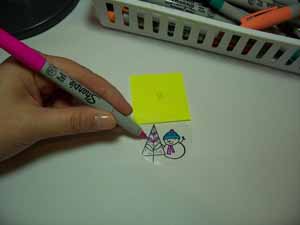
Flip the transparency circle over, mark it with a "B" and color the image with Sharpie markers.
-
Step 5
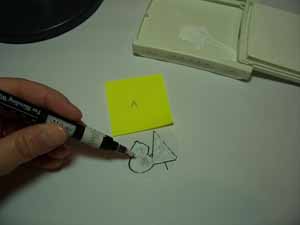
Flip the circle back to Side A. Squeeze a little white pigment ink onto the lid of the ink pad and apply carefully with a blender pen. Stay within the black lines, and fill in the entire stamped image with pigment ink, until the back of the stamped image is wet and sticky.
-
Step 6
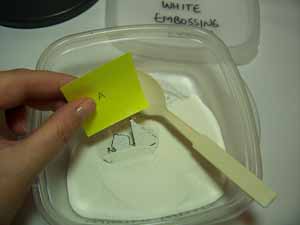
Sprinkle the wet surface with white embossing powder.
-
Step 7
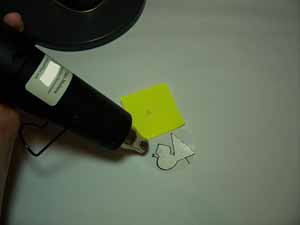
Use heat tool melt the embossing powder. Do not overheat.
-
Step 8
If a sentiment is desired, stamp on Side B. Use Stazon write something memorable (like the year) with a Sharpie marker. Set the stamped transparency circle aside while the glass ornament is prepped.
-
Step 9
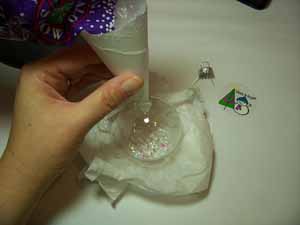
Take the metal hanger and cap off the neck of the ornament and set it aside. With a small funnel made of scrap paper, stuff about 2 tablespoons of Buffalo Snow inside the ornament.
-
Step 10
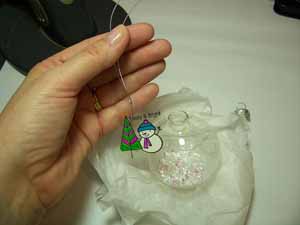
Thread a 6-8" piece of silver cord through the hole previously punched in the transparency.
-
Step 11
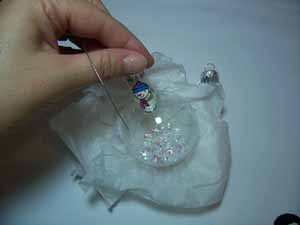
Roll the transparency circle into a loose tube, with the shiny part out, being very careful to hold onto the silver cord at the top.
Stuff the tube down the neck of the ornament. Don't let go of that silver cord!!
The transparency circle will pop open and will dangle and turn around nicely inside the glass ball.
-
Step 12
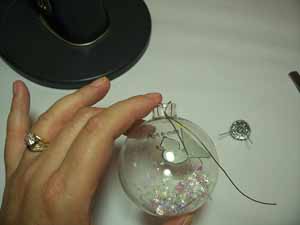
Apply a mini glue dot to the outside neck of the ornament. Adhere silver cord to the glue dot and trim excess cord with scissors.
-
Step 13
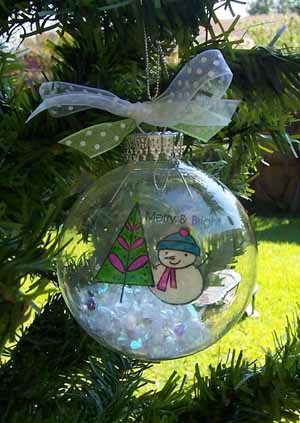
Carefully replace metal cap. Finish ornament with ribbons and a hanging loop.
Supplies
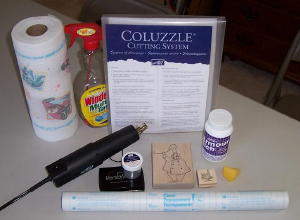
- 9 1/2" glass dessert plate or other flat surfaced glass
- 1/4" circle punched from dark cardstock
- Scotch™ Tape
- Coluzzle© cutting system
- Adhesive-backed (Contact™ ) shelving paper
- Glass cleaner spray
- Paper towels
- Embossing Buddy™
- Rubber stamp(s)
- Versamark™ pad
- Embossing powder (any color)
- Embossing heat tool
- Rubber or latex gloves
- Armour Etch Cream™ available at local craft stores [buy it]
- Sponge wedge or foam brush
- Scraping tool of some sort
- Kitchen timer or clock Note: Although etched glass is food safe when complete, it looks nicer to put the image on the backside of the plate.
Step-by-Step
-
Step 1
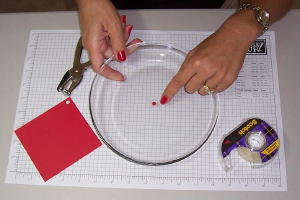
Attach the 1/4" cardstock circle to the center of the plate's eating surface with Scotch™ tape. There's no need to measure to find the exact center. This dot will be removed later; it is a guideline for stamp placement.
-
Step 2
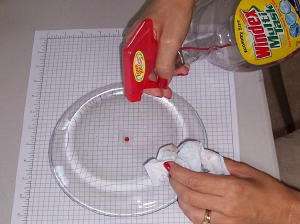
Clean the back side of the plate thoroughly with glass cleaner and a paper towel. Any fingerprints are a glass etcher's biggest challenge so keep the etching surface as clean as possible.
-
Step 3
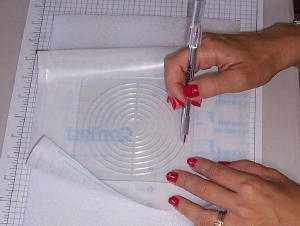
Using the Coluzzle™ circle cutter, create a frame from a piece of Contact shelving paper, using the largest cutting ring of the circle template. Discard the center piece.
-
Step 4
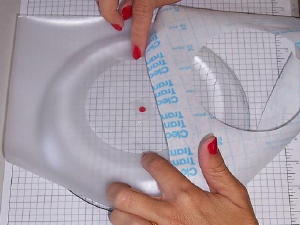
Affix the frame to the back side of the plate, using the dot as a centering point. The glass etching cream will be applied inside this framed area, make sure it's pressed down well with no gaps or air bubbles along the edges by running a finger around the inside edges of the frame.
-
Step 5
Gently clean the area inside the frame with glass cleaner and a paper towel to remove any fingerprints.
-
Step 6
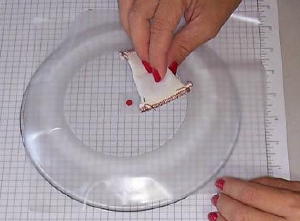
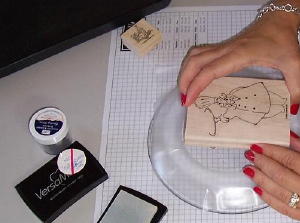
Swipe the Embossing Buddy™ across the framed area to reduce static and the slippery-ness of the glass when you stamp.
-
Step 7
Ink the stamp of your choice with Versamark™and carefully stamp in the center of the framed area using the taped dot as your guide. Glass is slippery, so use a steady hand.
Tip: If a mistake is made, repeat steps 5 and 6.
-
Step 8
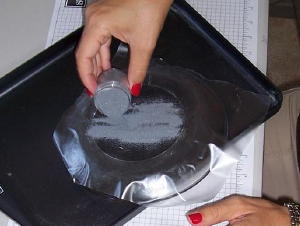
Apply any color embossing powder to the stamped image. The color does not matter as it will get scraped away at the end.
-
Step 9
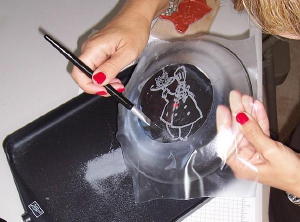
Remove excess powder with a small paintbrush if necessary.
-
Step 10
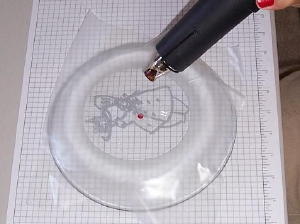
Use the embossing heat tool until the embossing powder is set and shiny. This takes a while to heat set because glass is much thicker than cardstock. If you're not sure it's done, heat some more.
Caution: Take care and avoid scorching the edges of the frame. Do not hold the plate while heating; the glass gets very hot.
Tip: If a mistake is made, repeat steps 5-10.
-
Step 11
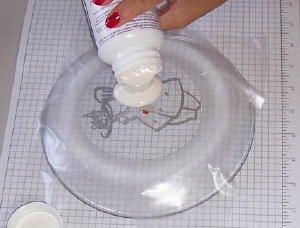
Pour a large blob of etching cream into the center of the contact paper circle frame.
Caution: Armour™: Etching Cream is caustic to skin so wear latex or rubber gloves just to be safe. The cream smells like rotten eggs, so work in a well-ventilated area.
-
Step 12
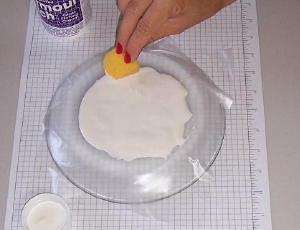
Using your sponge wedge or foam applicator, lightly brush the cream right to left, and then up and down to ensure even coverage.
THICK coverage is key, and you can go over the inside edges of the frame. If you make a mistake, wipe it away quickly with a damp cloth. This cream begins etching very quickly!
-
Step 13
Set a timer for 5 minutes.
-
Step 14
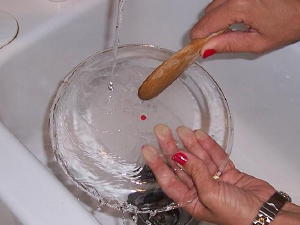
When the timer goes off, go to the sink. Rinse the plate very thoroughly with warm water, rubbing slightly with a gloved hand or a clean sponge. Keep rinsing until no white cream remains. Discard the frame. Remove gloves rinse a little more, making sure no residue is left on either side of the plate. Scrape embossed image with a fingernail, wooden spoon or a plastic scraper.
-
Step 15
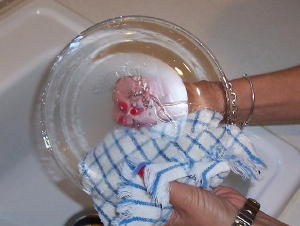
Remove tape dot and dry with a clean cotton towel.
Any unetched areas can be touched up by applying a small dab of etching cream with a toothpick, waiting 5 minutes and rinsing again.
Note: Etching cannot be reversed. If there was cream in places where it shouldn't have been, it can't be repaired.
-
Step 16
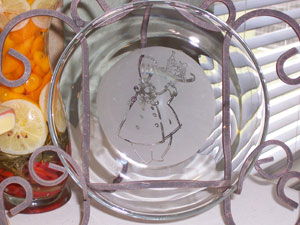
Completed project.
Video!
Variations
- Hint: You can get Armour™ Etch Cream at most craft stores. Open the bottle before your purchase and look inside. It should be milky white with no chunks. If it is yellowy or chunky looking, put it back and ask the store manager to order some more. You can etch on any size container but it's much easier to work with nice, flat surfaces. Rounded vases and hurricanes are pretty but can be very tricky because of the curve. I have chosen a 9 1/2" dessert plate, but any square vase or votive holder would work nicely.
Supplies

- Spellbinders Create a Flake 1 or Snowflake punches
- Ranger Glossy Accents, Matte Accents, Crystal Effects or other clear drying glue
- Glitter (Art Institute Krystallos Vintage Glass Glitter used here)
- Craft Wire
- Buttons
- Any type of ink
- Sponge Dauber
Step-by-Step
-
Step 1
Die cut and emboss the snowflakes.

-
Step 2
Stencil snowflakes using ink and sponge dauber.

-
Step 3
Apply Glossy Accents to Snowflakes.

-
Sprinkle on glitter. Set aside to dry.

-
Step 4
Assemble snowflakes using buttons and wire as shown.

-

-
Step 5
Your snowflake embellishment is finished.

-
Use it on your project.

Video!
Supplies
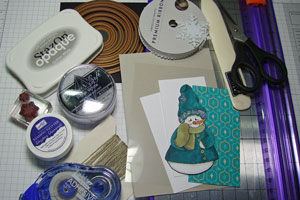
- One 4” x 6” piece of cardstock (Sahara Sand used here)
- One 2” x 4” piece of patterned paper (Holiday Lounge used here)
- Two 2” x 4” pieces of white cardstock
- Two scrap pieces of white cardstock
- Acetate
- Circle cutter (Spellbinder Nestabilities™ and Cuttlebug™ used here)
- Scissors
- Paper Trimmer
- Adhesive
- Stamps (FireCracker Designs by Pamela’s Gifts of Love used here)
- Embellishments
- Flower Soft™ Polar White (optional)
- StazOn™ Opaque Cotton White ink (optional)
Step-by-Step
-
Step 1
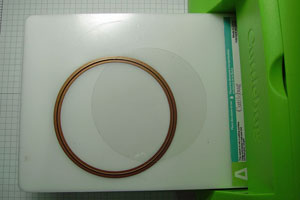
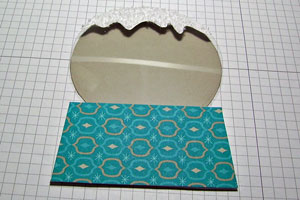
Use your circle cutter to create a 3.75” circle out of acetate.
-
Step 2
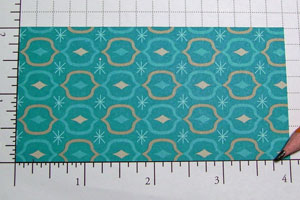
Make pencil marks at 0.25” from each end of the 2” x 4” piece of patterned paper.
Repeat on the two pieces of 2” x 4” white cardstock.
-
Step 3
Using your paper trimmer, create tapered base edges by cutting from your pencil marks to the opposing corners.
Repeat on two pieces of 2” x 4” white cardstock.
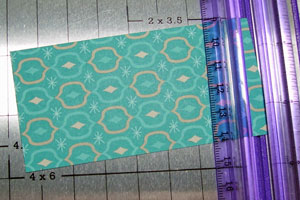
-
Step 4
Attach acetate circle to the tapered base.
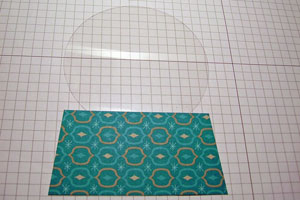
-
Step 5
Attach one tapered white cardstock base to the backside of the patterned paper base, hiding the glued edge of the acetate circle.
Optional:
The second tapered base can be used inside the card, if desired.
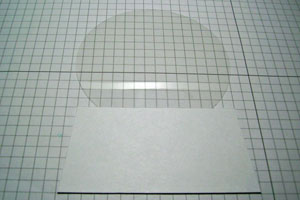
-
Step 6
Position the 4” x 6” piece of cardstock lengthwise, and fold the paper 0.5” from one end.
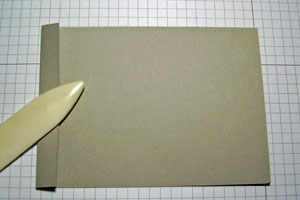
-
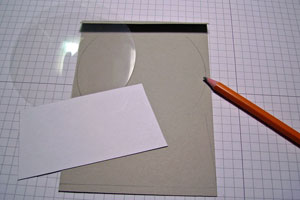
Step 7
Using your base and globe as a template, trace the same shape onto the folded piece of 4” x 6” cardstock.
Hold the flap down to extend the top of the circle onto that folded end of paper.
-
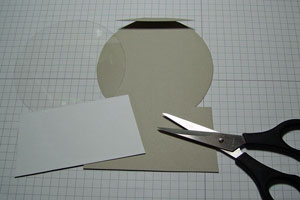
Step 8
Cut out the snow globe shape using your scissors.
-
Step 9
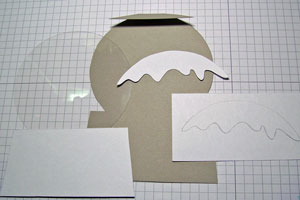
Trace the top of your acetate circle onto one piece of scrap white cardstock, then freehand draw the shape of a snowdrift and cut out.
This will be attached at the top of the snow globe to hide where the acetate will attach to the flap of the 4” x 6” piece.
Optional:
Trace and cut out an identical snowdrift to hide the flap on the inside of the card.
-
Step 10
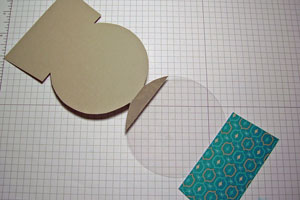
Attach the 4” x 6” cardstock to the acetate at the flap.
-
Step 11
Attach scrap paper snowdrift to hide the attachment flap.
Optional:
Add Flower Soft™ to create the texture of snow.
-
Step 12
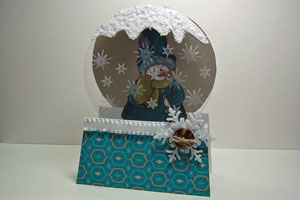
Decorate and finish your card. Trim any uneven edges with scissors.
Optional:
Add snowflakes to the acetate using white StazOn™.
Video!
Supplies

- Markers and/or Ink Pads
- Shrinky Dink brand paper (frosted rough & ready used here)
- Thread
- Image Stamp
- Glue Dots
- 1/8” Circle Punch
- Paper Piercing Tool
- Glass Ornament
- Preheated oven (325 degrees)
Step-by-Step
-
Step 1
Color directly on stamp with markers.

-
Step 2
Huff (breathe on image to re-moisten ink) and stamp onto the rough side of shrink plastic.
Variation:
Stamp an outline image, then apply color.

-
Step 3
Trim image as needed. Here, paper was precut using the Cricut Storybook cartridge.
Punch a hole at the top center of the piece.

-
Step 4
Slip a piece of thread through the punched hole and tie.
Cut the thread short at the image, and leave the other end long so it can dangle out of the ornament.

-
Step 5
Carefully roll the shrink plastic, shiny side in, being careful not to crack the plastic.
Slide the tube into the glass ornament.

-
Step 6
Use glue dots to adhere the string of the images to the bulb, so they dangle.

-
Step 6
Rest the ornament on a cookie sheet and bake for about 3 minutes at 325 degrees.
The image will shrink, curl, then flatten. When it has flattened, it is ready. Let cool.

-
Step 7
Add embellishments and finish your project.


No hay comentarios:
Publicar un comentario